Sunday, October 31, 2010

FREE Polar Playtime Papers


Click to enlarge and then save on your computer.

FREE Rainy Day Papers


Another set of free papers. Click on the picture to enlarge and then save it on your computer.
Thanks.

Winter Wonderland BLUE


I love blue colors on the new Winter Wonder DCWV paper stack. I cut everything from Winder Woodland cricut cart.

Thanks.

FREE Fruity Papers


Fruits and berries. Click on the picture to enlarge and save it to your computer to print out for your cards and other projects. The colors will look brighter if printed on photo paper (I used matte photo paper, which is not expensive and thick but gives great colors).

Enjoy!

FREE Deck The Halls Papers


Some more papers for you to save on your computer and print out for your projects.

Just click on the picture to enlarge it and save.

Enjoy.

Thursday, October 28, 2010

SNOW Card


I am in love with the new Winter Wonder paper stack by DCWV. I love love love blue and white colors for winter/holiday cards. I am not a Christmas person. I came from Russia so New Year is more celebrated there. Enjoy!

FREE Baby Papers


If you click on the pic to enlarge, then save it on your computer to print and use! Enjoy.

FREE All Sewn Up Papers for you!!!


Just click on a pic to enlarge and save on your computer to print and use whenever you want.

FREE Jungle Theme Papers to download


Enjoy! Just click on the pic to enlarge and then save on your computer to print and use.

FREE Holiday Papers with Santa Claus!


Another set of FREE papers downloaded from an online magazine. Click on the picture to enlarge and then save it on your computer to print and use.
Thanks.

Happy Scrapbook LO


Here is Sasha last year. She is always laughing and smiling.
Enjoy.

FREE Bees And Bugs Paper Bundle


Just click on the photos and save them on your computer to print and use.

Bee Happy!!! Using BEE paper!


I just love the paper that I was able to download from an online magazine.
Because many people were interested in it I will post it here so you can download it from me. It's kind of complicated to post the link, as the magazine's archive is not well organized and you have to browse backward until you find what you need. I spent some time and downloaded all the free papers that they offer. They ALL are great!

Use them if you like.

Thanks.

Wednesday, October 27, 2010

I Love Snowmen


Here is a cute card I made using Rock Princess, Winter Frolic and Cuttlebug cut/emboss bundle.

Hello Kitty-Christmas


I really like Hello Kitty Greetings cartridge. A lot of small pieces though. I would not want to cut an image less than 3.5 inches.

Saturday, October 23, 2010

A Card For DAD


Just because I never made a male card, i thought I would give it a try. Enjoy.

Thursday, October 21, 2010

Christmas Cards. #4 (disappointing)


Yesterday was a bad day for me to make cards. But I persisted and was frustrated a lot by the end of the process.

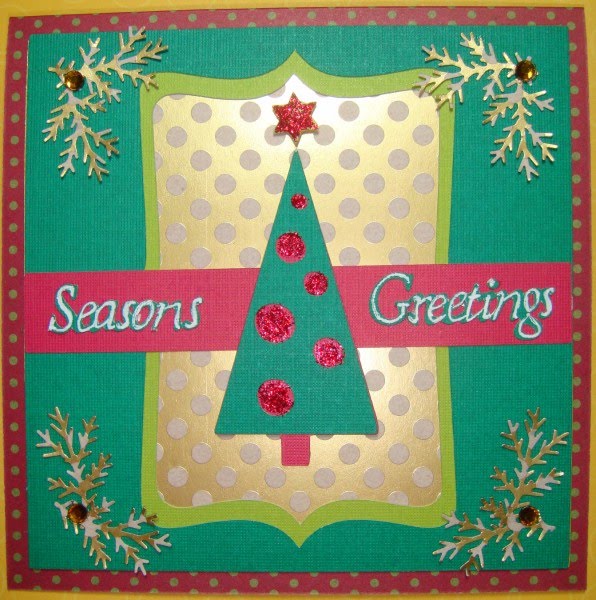
I was making card #4 which has a flourish on it and words Happy Holidays. First I made one with gold background and I did not like the colors I got, so I proceeded with a different color combination.

By the way the size I cut the mat and all the layers except the card base was 5 inches and in was ACTUALLY 5 inches. If you wish your card to have a border around the mat (like mine) make the card at least .25 bigger (mine is 0.5 bigger).

I noticed that the words were very intricate even at this size, but I managed to glue it down. What happened with the white/blue colors, my words did not want to cut, and were tearing a lot. usually I am pretty good with the settings, probably this time I could not find the right paper, after 5 tries, these words came out Ok, by the time I lost so much of my precious time after taking care of my 3 girls and doing all the stuff around the house, I only have 1 hr for myself. I am not even happy with this card, it looks plain and I can't think of anything to make it better. So said I am not going to make this card anymore...


I must be going and make something different.

Enjoy.

Wednesday, October 20, 2010

Christmas Cards. #3


OK, here is a card with the Christmas Tree. Simple. I cut all the cuts (except for the base) at 5inches and they all came out at 5 inches. Which means that the card base itself would also cut at 5 and the mat (the completed picture) would cover the whole card. I usually prefer to leave a border on the card, so I cut the base at 11 by 5.5 inches and got 5.5 square card. I then adhered the image.

Some details:

The words seem to be the smallest you could get not torn (was still hard to work with), I would not recommend smaller size. The corners seemed plain, I added MS branches and some bling. I also used patterned paper behind the tree and I like it.

Thanks...

To be continued.

Christmas Cards. #2


My second card was the one with the people in the sled and with flourishes on the corners. I like these flourishes as they make the card look not so plain as some of the other ones. I added some blue stickles to the flourishes to make them sparkly.

Sizes (funny). I was not going to cut the card base that is on the bottom of the row on the overlay as it is in fact a regular square card. So i thought I would cut all the layer at 5.25 to put them on a 5.5 card base. I cut the layers at 5.25 and... the actual size of the first mat (and the full completed picture) came out at 4.75. Which means in this case they considered that this would be adhered as a mat on a 5.25 card with 0.25 border on each side. So I cut a 10.5 by 5.25 white cardstock and folded in half to make a 5.25 square card base.

I also think the base card on the bottom is not exactly intended for the layers in the row, it can be used for any square image in any row. Which means I could easily use the card with trimmed border (under the Peace-Bird card) and it would look cute too.

I think I should have cuttlebugged th background. It would look better.

To be continued...

Tatiana

Christmas Cards sizes. #1


As promised I will try to give you some details on the sizes of the cards and layers from Christmas Cards cartridge. My first card was the one with the bird on a branch that says Peace on it. As you already know most seasonal carts has layers for one image placed in a row on the overlay. So I decided to make a 4.25 inch card and cut all 5 layers (going from the top to the bottom) in row #7 (they look like square, bird, word, branch and the card base).

The only thing I did not like that the first layer (square) which I wanted to look like a mat actually was cut at 4.25 and covered the whole surface of the card base. The other thing that I noticed that the card base itself has a cute little trim on it so I would not recommend cutting a regular square card on your trimmer. I would rather cut the card base 0.25 inch larger that all the other layers.

The bottom of the card looked kind of plain so I tied some ribbon and added stickles to the berries and beak.

This is a good size for all cuts not to tear and it fits in A2 envelope.

To be continued with other cards.

Absolutely FAB-ulous


I was inspired by Julie at readysetstamp.com. I loved using the fall colors on this card. Enjoy.

Tuesday, October 19, 2010

Christmas Cards


I have had Christmas Cards seasonal cartridge for quite some time now. Maybe I was waiting for someone on the Cricut MB to show up with the cards using it but this did not happen.

So I thought why don't I start and see how they look like.

I have to say they are very easy to make and are pre-designed for you. As always I have a problem picking the right paper as I did not want to make the same colors as they offer in thw booklet.

The sizes are a little bit tricky, sometimes the first layer (the mat) would cover the whole surface of the card base and on some cards it makes it .25 inch smaller so it would actually look like a mat.

Use your Gypsy or DS to see exact sizes if you don't want to be disappointed.

So far I have made three cards. Enjoy.

Let's call the The Tree, The Village and The Bird.